Español
 العربية
 Francés
 Русский
 Português
 Deutsch
 日本語
 한국어
 Việt


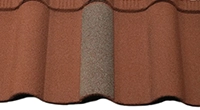


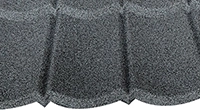




Stone Coated Metal Roof Flashing: How to Detail Wall Edges and Chimneys
Stone Coated Metal Roof Flashing: How to Detail Wall Edges and Chimneys
Why Flashing Matters at Roof-to-Wall Connections
When people look at a finished stone coated metal roof, they usually notice the tile color, the roof lines and how neatly the edges have been finished. The flashing is less noticeable, but it plays an important role in managing rainwater around the places where the roof meets a wall or chimney. These junctions are different from the open roof surface because water can collect or change direction there, and the installer has to connect the roofing material with another building surface.
This is why a roof can look well finished from the ground and still develop a leak around a wall or chimney if the junction detail has not been handled correctly. The issue is not always the main roofing tile. Water may enter through an incorrectly arranged flashing joint, travel behind a wall covering, or find a gap where the underlayment and flashing do not connect as intended. When a leak appears, it is worth investigating the complete junction instead of assuming that the tile itself is the problem.
At FUODE ROOFING, we manufacture stone coated metal roofing tiles and related roofing components. When discussing roofing materials with overseas buyers, we believe it is useful to explain how accessories such as wall side flashing and chimney flashing fit into the wider roofing system. The exact construction depends on the tile profile, roof structure, wall material, local building requirements and the installation instructions for the selected system. There is no single flashing detail that should be copied onto every building, but several practical principles can help buyers and installers understand what needs to be confirmed before work begins.
What Is Wall Side Flashing, and Where Is It Used?
Wall side flashing is used where a sloping roof meets a vertical wall. This may happen where a roof runs alongside the side of a taller wall, where a lower roof connects to a higher building section, or where a roof meets a wall around an extension. The purpose is to help direct water away from the junction and toward the roof drainage path, rather than allowing it to enter the gap between the roofing and the wall.
The flashing generally needs to work with several other parts of the roof assembly, including the stone coated metal roofing tiles, underlayment, wall weather barrier and wall finish. The visible metal piece is only one part of this arrangement. Its upper edge must be integrated with the wall's water-management layers, while its lower section must coordinate with the roof covering so that water can drain outward. The precise arrangement depends on the wall construction and the roofing system.
Before installation, the contractor should check the roof drawing and identify which type of roof-to-wall junction is present. A wall that runs alongside the roof slope may require a different arrangement from a wall that rises directly above the lower end of a roof slope. The flashing profile, dimensions and connection details should be selected for that actual condition, not simply chosen because a product is labelled “wall flashing.”
It is also important to check the length and quantity required. A long wall junction may need multiple flashing pieces, and the joints between those pieces must follow the specified overlap and fastening method. The required overlap depends on the product and installation instructions. If the buyer is ordering accessories from a stone coated metal roofing manufacturer, providing the relevant wall dimensions and roof details can help clarify which component is required and how much material should be included.
How Should Wall Side Flashing Be Installed?
The first principle is to create a clear drainage path. Rainwater moving down the roof should be directed over the appropriate flashing surfaces and away from the wall junction. The flashing should be integrated with the underlayment and the wall's weather-resistive layer according to the construction detail. If these layers are arranged in the wrong sequence, water may find a path behind the flashing even when the visible metal looks neat.
In many roofing systems, the flashing is positioned so that its roof-side section coordinates with the roofing material, while its wall-side section is integrated with the wall's water-management layers. Some systems use a formed side flashing over the upturned edge of the roofing material; others have different profiles or connection methods. The installer should follow the instructions for the selected stone coated metal roofing system rather than assuming that a detail from another type of roof will work in exactly the same way.
The top edge needs particular attention. Depending on the wall finish and approved detail, it may be covered by counterflashing, integrated behind the wall's weather barrier or secured using another specified method. Simply attaching a metal strip to the outside of a wall and applying sealant along its upper edge may not provide the intended protection if water can enter behind it. The correct connection depends on whether the wall is masonry, rendered, clad with siding or constructed using another system.
Fasteners and sealants should also be used as specified. Their type, location and compatibility with the roofing and wall materials matter. Sealant can help seal a designed joint, but it should not be treated as a replacement for correct flashing geometry, suitable overlaps or properly integrated water-management layers. Where a flashing system requires mechanical fixing, the installer should use the specified fasteners and avoid introducing unplanned holes in drainage areas.
At the lower end of a roof-to-wall junction, water must be able to continue toward the eave or gutter without being directed behind the wall finish. Depending on the roof arrangement, a kick-out or diverter flashing may be needed where the wall junction terminates above an eave. Whether this component is required and how it should be formed depend on the actual junction and local construction details. This is one reason it is useful to review the entire wall intersection rather than looking only at the straight section of flashing.
Chimney Flashing Requires More Than One Metal Strip
A chimney creates a more complicated junction because the roof meets the chimney on several sides. Water flows down the roof toward the chimney, and rain can also strike the vertical chimney surfaces. The flashing must coordinate with the roof covering around the front, sides and upper side of the chimney, while also connecting appropriately to the chimney's exterior construction.
A typical chimney flashing arrangement may include apron flashing at the downslope side, side flashing along the sides and a back-pan or other upslope detail behind the chimney. Counterflashing may also be used to cover the upper edge of the base flashing where it meets masonry. The precise combination varies with the chimney dimensions, roof design, wall construction and selected roofing system. The important point is that the flashing needs to manage water around the complete perimeter, not just cover the front edge.
At the downslope side, apron flashing helps direct water from the chimney's front junction onto the roof drainage surface. Along the sides, the flashing needs to work with the roof tile profile and the water path running down the roof. At the upslope side, water approaching the chimney must be directed around the obstruction without entering behind the flashing. The design may call for a back-pan or a small cricket, particularly where the chimney's width and roof geometry make water accumulation a concern. The need for such a feature should be assessed by the responsible designer or installer rather than decided from appearance alone.
The upper edge of chimney flashing needs careful coordination with the chimney wall. On masonry chimneys, the connection may involve counterflashing set into a suitable joint or another approved attachment method. Other chimney constructions require different details. Applying sealant over the top edge without considering the wall material, flashing connection and expected movement can leave the junction dependent on the condition of that sealant alone.
Chimney flashing also needs to account for the chimney's function. Where the chimney serves a fireplace, stove or other heat-producing appliance, the required clearances and materials must follow the appliance and chimney manufacturer's instructions and applicable building codes. Roofing accessories should never be installed in a way that compromises the required clearance from combustible materials.
Underlayment, Overlaps and Sealant: Three Details to Check
The first detail is the relationship between flashing and underlayment. Underlayment provides an additional water-management layer beneath the visible roof covering, but it must be connected to the flashing in the correct sequence. The intended laps should direct water outward and downslope rather than creating a route behind the metal. The required sequence can differ depending on whether the junction is alongside a wall, at the front of a chimney or behind it, so the installer should use the approved drawing for each condition.
The second detail is overlap. Flashing pieces may need to overlap one another, and their joints must be arranged to suit the direction of water flow and the manufacturer's instructions. The required overlap should not be guessed from the length of the metal pieces or copied from another product. At chimney corners, the transitions between front, side and rear flashing deserve particular attention because the pieces must connect into a continuous water-management detail. If the junction uses formed corner pieces, those components should be checked before the roof tiles are cut and fitted around the chimney.
The third detail is sealant. Sealant has a role in specified joints, but using more sealant does not automatically make a flashing detail better. The product must be suitable for the materials and exposure conditions, and it should be applied where the system requires it. Sealant cannot correct a poorly formed flashing, an incorrectly arranged overlap or a missing component. If a detail relies on sealant alone to prevent water from entering a junction, it is worth reviewing the design before installation proceeds.
These checks are particularly useful when inspecting a completed roof. Rather than looking only for a visible bead of sealant, the installer should confirm that the flashing sits correctly, the overlaps follow the intended direction, the wall connection is complete and water has a clear path toward the roof drainage system. Any concerns should be addressed before the surrounding finishing work makes the junction difficult to access.
Common Mistakes Around Walls and Chimneys
One common mistake is treating wall side flashing as a decorative edge. Because the component is relatively narrow, it can be easy to focus on whether the exposed metal looks straight while overlooking how its upper edge connects with the wall's water-management layers. A tidy appearance is important, but it is not a substitute for the correct installation sequence.
Another mistake is using the same detail for every roof-to-wall junction. A side-wall intersection, a roof that terminates against a taller wall and a chimney all have different water-flow patterns. A component that works in one location may not be suitable for another. The contractor should identify the junction type first and then select the appropriate flashing arrangement.
A third problem is leaving the accessory requirements until the main tiles have been installed. By that point, the installer may discover that a special flashing profile, corner component or additional material is needed. The crew may have to pause while the missing parts are measured, fabricated or purchased locally. Planning the flashing alongside the main tile order gives the buyer more time to confirm dimensions, quantities and supply responsibilities.
Finally, it is important not to assume that every leak near a chimney originates in the roof flashing. Water may also enter through defects in the chimney cap, masonry joints, wall cladding or other parts of the building envelope. A proper inspection should consider the whole junction and trace the likely water path before deciding which repair is appropriate.
What Buyers Should Confirm Before Ordering Flashing
For importers, distributors and roofing contractors, the most useful step is to provide the supplier with enough information to identify the actual roof detail. This may include the tile profile, roof drawing, wall construction, chimney dimensions, approximate flashing lengths and any project-specific requirements. Photographs can help explain the situation, but clear dimensions and drawings are more useful when the component needs to be matched to a particular junction.
The quotation should state which flashing components are included and which materials must be sourced separately. Buyers should confirm the type, dimensions, finish and quantity of wall side flashing, chimney flashing and any related accessories required by the approved design. If the project involves unusual roof geometry, it is worth checking whether standard components are suitable or whether additional detailing is needed.
At FUODE ROOFING, we understand that customers need clear information to coordinate roofing materials with their installers. When discussing stone coated metal roofing tiles and related accessories, we encourage buyers to confirm the roof profile and project requirements before the order is finalized. The appropriate flashing detail must still be verified against the specific roofing system, building design and local requirements, but early communication helps make the material scope clearer and reduces the risk of missing components.
Good Flashing Starts with Good Planning
Wall edges and chimneys occupy only a small part of the roof, yet they require careful attention because the roofing surface meets another building element at these locations. Correct flashing depends on the junction design, the arrangement of underlayment and wall layers, suitable overlaps, compatible fasteners and sealants, and a clear route for water to drain away.
For stone coated metal roofing projects, buyers should treat flashing as part of the roofing system rather than as an accessory to be added at the last minute. Reviewing the roof drawings, confirming the component specifications and agreeing on the installation details before shipment can help contractors work with fewer unanswered questions on site.
At FUODE ROOFING, we believe that trust is built through clear specifications, practical product communication and realistic expectations. When planning your next roofing project, discuss wall side flashing and chimney flashing alongside the main tiles, and make sure the final details are confirmed by the responsible roofing professional. A well-planned junction may not draw much attention once the roof is finished, but it is an important part of a roofing assembly designed to manage water properly.

— FUODE ROOFING —
Stone Coated Metal Roofing Source Factory | Shandong, China
www.fuode.com | Welcome factory visit & sample requests