Español
 العربية
 Francés
 Русский
 Português
 Deutsch
 日本語
日本語
 한국어
한국어
 Việt
Việt

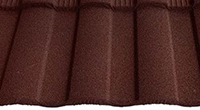


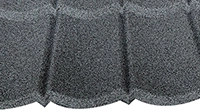

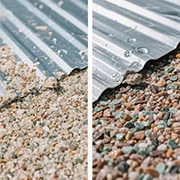



Worried About Roof Leaks? This Stone Coated Tile Installation Guide Covers Every Joint and Flashing
Worried About Roof Leaks? This Stone Coated Tile Installation Guide Covers Every Joint and Flashing
━━━━━━━━━━━━━━━━━━━━━━━━━━━━━━━━━━━━━━━━━━━━━━━━━━━━━━━━━━━━━━━━━━━━━━━━━━━━━━━━━━━━━━━━━━━━━━━━━━━━━━━━━━━━━━━━━━━━━━━━━━━━━━━━━━━━━━━━━━━━━
You can buy the best stone coated metal roof tiles in the world, but if installation goes wrong, the roof leaks — and you get the call, not the tile factory. We've seen it happen. A container arrives at a project site in Africa or Southeast Asia, local crew has never installed this type of tile, they figure it out as they go, and three months later water is coming through. Fixing it is expensive. This guide walks through the six critical stages of stone coated metal roof tile installation. It's written for importers and contractors who need a reference their crew can follow.
1. Pre-Installation: Roof Structure & Underlayment

Stone coated metal roof tiles weigh 3–8 kg per square meter — roughly 75% lighter than clay tiles. But light doesn't mean skip the structure check. Confirm rafter spacing is within 60–90 cm center-to-center, depending on your local building code. For re-roofing over an existing roof, evaluate whether the existing structure can handle the additional load.
Tools needed: a power drill with adjustable torque, self-drilling screws with EPDM washers, a circular saw with a metal-cutting blade, tape measure, level, and safety harness. No specialized equipment — any general construction crew already has these.
Lay a waterproof underlayment (breathable membrane or asphalt felt) over the rafters, starting at the eave and working up toward the ridge. Overlap individual sheets by at least 10 cm horizontally and 15 cm vertically, and seal overlaps with compatible tape. This layer is cheap insurance — under extreme weather it's what keeps water out when everything else is stressed.
2. Batten Installation

Install battens horizontally over the underlayment. Batten spacing depends on the tile specification, typically 33–38 cm apart. Getting the battens level matters — any deviation shows in the finished roof. In humid or coastal climates, use galvanized steel battens instead of timber. Timber rots faster than people expect in tropical environments.
Counter-battens installed vertically under the battens create an air gap for ventilation, reducing heat buildup and extending the roof's service life.
3. Start Tiling from the Eave

Begin at the bottom right corner of the roof. The first row should overhang the eave by 5–8 cm to direct rainwater into the gutter. Each tile has an interlocking channel on its side edge. When two tiles are joined, the channel clicks into place — you should hear or feel it seat. If the interlock isn't fully engaged, wind-driven rain can push water through the gap.
Fasten each tile with self-drilling screws at the crest (peak) of the tile profile, never in the valley. Standard is 4 screws per tile. Screws come with EPDM sealing washers — tighten until the washer just starts to bulge, then stop. Over-tightening flattens the washer and reduces its sealing ability.
Side overlap should be one full corrugation, about 10–15 cm. Check the alignment line after every row — a misaligned row creates problems for the rows above it.
4. Ridge, Eave, and Penetration Details

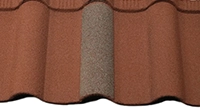
The ridge is the most common leak point on any metal roof. Cover the ridge intersection with ridge caps, overlapping each subsequent cap by at least 10 cm. Install a foam ridge seal or butyl tape underneath. Secure each ridge cap with screws.
At the eave, install a drip edge to keep birds and pests out and guide water into the gutter. For roof penetrations — chimneys, vents, skylights, pipes — use metal flashing with a waterproof sealant. These areas account for a small fraction of the roof surface but a disproportionately large share of leaks.
5. Final Inspection and Cleanup
Walk the entire roof after installation. Tighten loose screws, replace missing caps, and sweep away metal shavings and debris. Metal shavings left on the tile surface can rust and cause discoloration over time.
If possible, do a hose test — spray water over the roof at different angles and check for leaks from inside the attic or ceiling space.
6. Two Real Concerns Importers Ask About
Will local crews know how to install this?
The installation principles are similar to standard metal roofing, but the interlocking and fastening requirements are more demanding. Our approach: before the container arrives, have one experienced foreperson go through the installation drawings and video guide we provide with every shipment. That foreperson trains the local crew. For larger projects, on-site guidance can be arranged.
Will the roof hold up in a typhoon zone?
Wind resistance depends on three things: the connection strength between tile and batten, the quality of the interlock engagement, and the overall diaphragm stiffness of the roof frame. In typhoon-prone regions like the Philippines, we recommend increasing screw density — edge zones from 4 to 6 screws per tile — plus wind clips for additional hold.
FUODE ROOFING provides installation drawings and video guides with every shipment. Before shipment, we confirm the project location's climate conditions and note any adjustments needed in the technical documentation — screw count, overlap minimums, flashing details. Tile quality does half the job; installation does the other half. Get both right, and the roof delivers what it's supposed to.
Note: This is a general installation reference. Specific parameters should follow the project technical plan.