
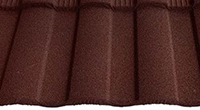
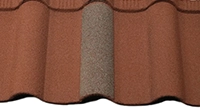


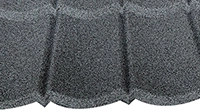


What Should You Pay Attention to When Installing Stone-Coated Metal Tiles?
Proper installation is crucial for any roofing system to perform as intended. For stone-coated metal tiles, specific installation techniques and precautions determine whether you'll benefit from their full potential or face persistent problems. So what exactly should you pay attention to when installing these advanced roofing materials?
Critical Pre-Installation Preparation
Before the first tile is placed, thorough preparation sets the stage for a successful installation. The roof structure must be properly assessed to ensure it can support the new roof, though stone-coated metal tiles are significantly lighter than traditional options. The deck should be clean, dry, and structurally sound. For concrete surfaces, a cement mortar leveling layer is typically required, with surface flatness controlled within ±5mm . This precise preparation prevents unevenness that could compromise the final appearance and performance.
The underlayment system is another critical preparatory element. A common effective structure from bottom to top includes: concrete structure layer, cement mortar leveling layer, SUB waterproof membrane, wooden battens, extruded polystyrene insulation boards, and aluminum foil as a moisture barrier . This multilayer approach provides secondary waterproofing and enhances the roof's thermal performance.
Precise Installation of Battens and Mounting System
The batten system forms the backbone of a properly installed stone-coated metal tile roof. Vertical battens (also called counter-battens) are first installed directly over the underlayment, running perpendicular to the eaves. These are typically 40-50mm thick and must be treated with anti-corrosion treatment for longevity . They're fixed using steel nails or concrete nails driven at least 3cm into the leveling layer to ensure firm anchoring .
The spacing of vertical battens is normally 90cm apart, measured from center to center, running from eave to ridge . Horizontal battens (load-bearing battens) are then installed parallel to the eaves, with the first line spaced 34cm from the starting edge, and subsequent lines spaced 38cm apart . This precise spacing is critical for proper tile engagement and load distribution.
For ridge installation, special higher battens (4-5cm above main battens) must be installed to accommodate ridge tiles . At valleys, space must be reserved for valley gutters, while at gable ends, batten width should not exceed 4cm to properly support edge trim .
Proper Tile Installation Techniques
When placing the tiles themselves, begin by transporting materials to the rooftop in manageable units—typically 10 tiles at a time—distributed evenly across the roof surface . Installation should proceed from bottom to top, symmetrically on both sides of the roof to maintain balance .
Each tile must properly engage with the batten system, with side laps of approximately 8cm between adjacent tiles, positioned to avoid facing the prevailing wind direction . The vertical overlap between upper and lower tile rows should be about 4cm, with the upper tile's front edge snapping into the lower tile's rear raised portion .
Secure Fastening Practices
Correct fastening is perhaps the most critical installation element. Stone-coated metal tiles are secured using 4×40mm wood thread self-tapping screws . For standard installations, at least 4 screws per tile are required, positioned horizontally at the front edge's arc transition points . In high-rise buildings or steep roofs (over 60 degrees), this increases to at least 6 screws per tile for enhanced wind resistance . Crucially, fasteners should not be overtightened, as this can distort the tile or compromise the sealing washer.
Specialized Details for Critical Areas
Valley areas require installation of valley gutters before placing adjacent tiles. These should extend at least 10cm under the overlapping tile on each side and have a minimum 10cm overlap at joints . At ridges, both main and hip ridges need special ridge tiles that overlap main field tiles by at least 5cm on each side . These are secured with screws through both sides into the raised ridge battens.
Eaves and gable edges require specific metal trim pieces that provide a finished appearance and prevent wind-driven rain infiltration. For penetrations like plumbing vents or chimneys, custom flashings should be fabricated, with the surrounding tiles raised approximately 5cm and secured to the penetration's base, followed by applying flashing and sealing with high-quality construction adhesive or cement mortar .
Critical Safety Considerations During Installation
Roof installation represents high-risk work requiring strict safety protocols. All workers must wear fall protection systems, with safety lines securely anchored . Additional precautions include wearing anti-slip soft-sole shoes and never working bare-chested . Work should be suspended during high winds (over level 5), rain, or thunderstorms .
Material handling also demands attention—workers should wear gloves during transportation and handling, with stacked panels limited to no more than 20 layers to prevent tipping or structural damage to lower tiles . Power tools require grounded movable power distribution boxes with individual circuit breakers for each machine to prevent electrical accidents .
Quality Assurance and Post-Installation Verification
After installation completion, comprehensive inspection is essential. Check that all exposed screw heads have protective coating applied to prevent corrosion . The entire roof surface should be cleaned of installation debris and construction residues. Finally, conduct a water spray test—after installation or during rain, check that no water infiltration occurs, particularly at details like valleys, penetrations, and edges .
By meticulously addressing each of these installation elements, contractors can ensure stone-coated metal tile roofs perform to their designed potential, delivering the decades of reliable, maintenance-free protection that makes them such an outstanding roofing choice.


